Physical Address
304 North Cardinal St.
Dorchester Center, MA 02124
Physical Address
304 North Cardinal St.
Dorchester Center, MA 02124
Discover 24 elegant kitchen backsplash ideas to create a modern sanctuary. Blend timeless design principles with practical tips for a soulful and beautiful home.
Can we talk about why so many people get kitchen backsplashes wrong? It’s not about finding the prettiest tile on Pinterest. I see it all the time—a beautiful, expensive material is chosen, but it feels hollow, like a statement piece shouting in an empty room. The problem is that most design advice treats a backsplash as decoration. But in the traditions I draw from, every element in a home contributes to its soul. It’s not about what looks trendy; it’s about what feels like a sanctuary.
A kitchen is the heart of the home, a place of nourishment, conversation, and creation. The wall behind your counter, then, is its qibla—the visual and spiritual focal point. It should reflect order, beauty, and intention. Forget the noise about what’s “in” or “out.” What matters is creating a space that nurtures you. I learned this the hard way, early in my career, when a client insisted on a jarring, flashy mosaic that fought with every other element. The room was loud, not serene. After that, I promised to always start with the soul of the space, not the surface. Let’s walk through how to create a backsplash that is not just beautiful, but meaningful.
Before a single tile is chosen, we must begin with intention. This initial phase is a quiet conversation with your space. It’s about listening to what the room needs to feel whole and harmonious, rather than imposing an idea upon it. Think of this as laying the spiritual groundwork for the physical form that will follow.
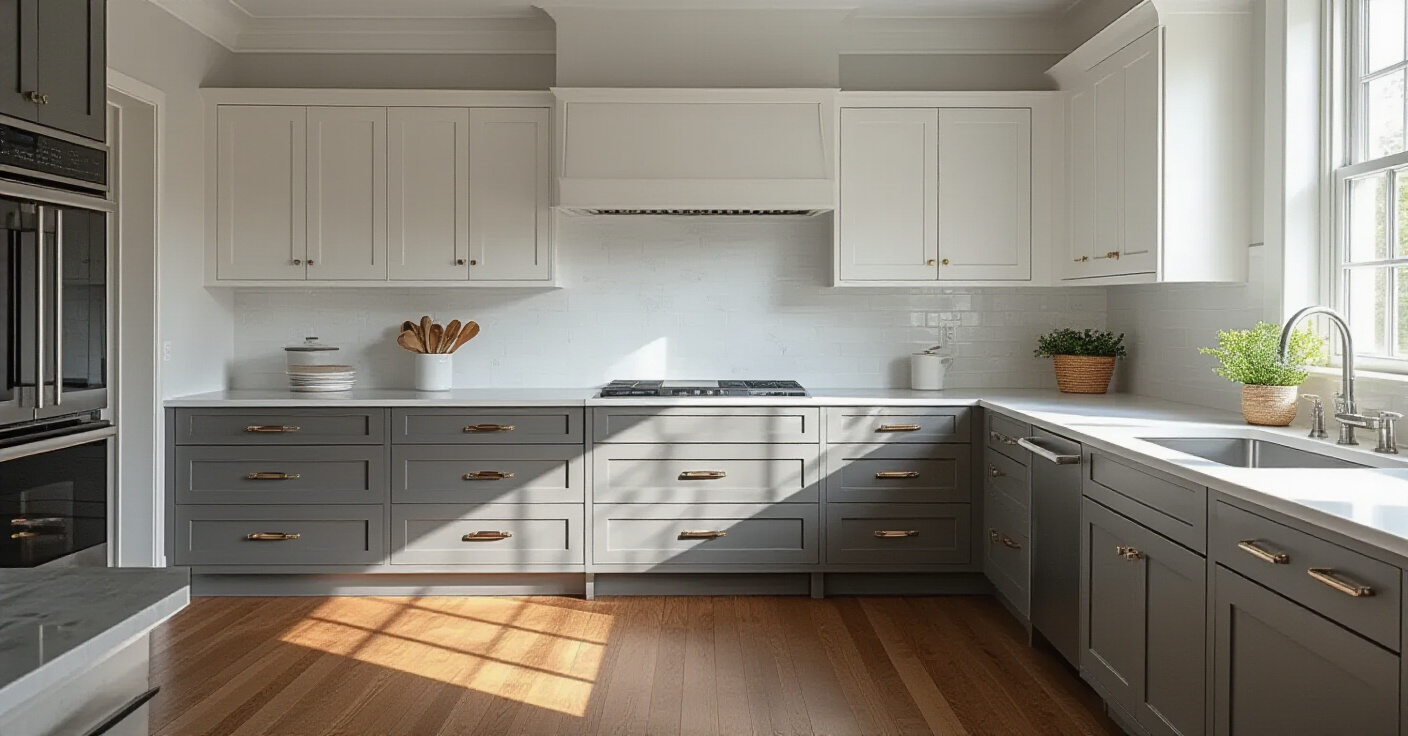
The most profound mistake one can make is choosing a backsplash in isolation. It cannot be an island; it must be a bridge, connecting the grounding presence of your countertops to the reach of your cabinetry. Its purpose is to create a visual harmony that calms the eye and spirit, weaving together the different textures and colors of the kitchen into a single, serene tapestry.
True elegance lies in this quiet dialogue between elements. Before you fall in love with a bold pattern, take a step back and listen to what your kitchen is already telling you. Does it speak in the language of clean, modern lines or in the warm, textured tones of tradition? Your backsplash should join this conversation, not interrupt it. A client once showed me a picture of a vibrant, contemporary Zellige tile for her classic Shaker kitchen. Instead of saying no, we found a handmade ceramic tile with a subtle geometric relief—it honored both her desire for artistry and the kitchen’s timeless character.
This principle of harmony ensures that your design choices feel integrated and intentional, laying the foundation for a space that is not just seen, but deeply felt. This quiet balance is the secret to a design that will endure long after fleeting trends have passed.
So often, a budget is seen as a restriction, a barrier to beauty. I encourage you to see it differently. A budget is simply a framework for creativity, a call to be more intentional with your resources. True serenity in design does not come from expense, but from the thoughtfulness of your choices. Don’t believe the myth that you need hand-carved marble to create a soulful space.
Some of the most breathtaking kitchens I have designed relied on the humble elegance of porcelain. A large-format porcelain slab, for example, can mimic the seamless tranquility of natural stone at a fraction of the cost, and its non-porous surface is a practical blessing. By defining your budget early, you are not limiting your vision; you are focusing it. This allows you to explore materials that offer both beauty and wisdom, aligning your aesthetic desires with practical stewardship.
As you consider your resources, you are setting the stage for a process rooted in clarity, not excess. This thoughtful approach ensures that every choice, from the grandest gesture to the smallest detail, serves the greater purpose of creating your sanctuary.
The physical space your backsplash occupies is a decision of visual weight and energy. Will it be a grand, soaring statement that reaches for the ceiling, or a graceful, grounded line that runs along the counter? There is no right answer, only the one that honors the architecture and spirit of your kitchen.
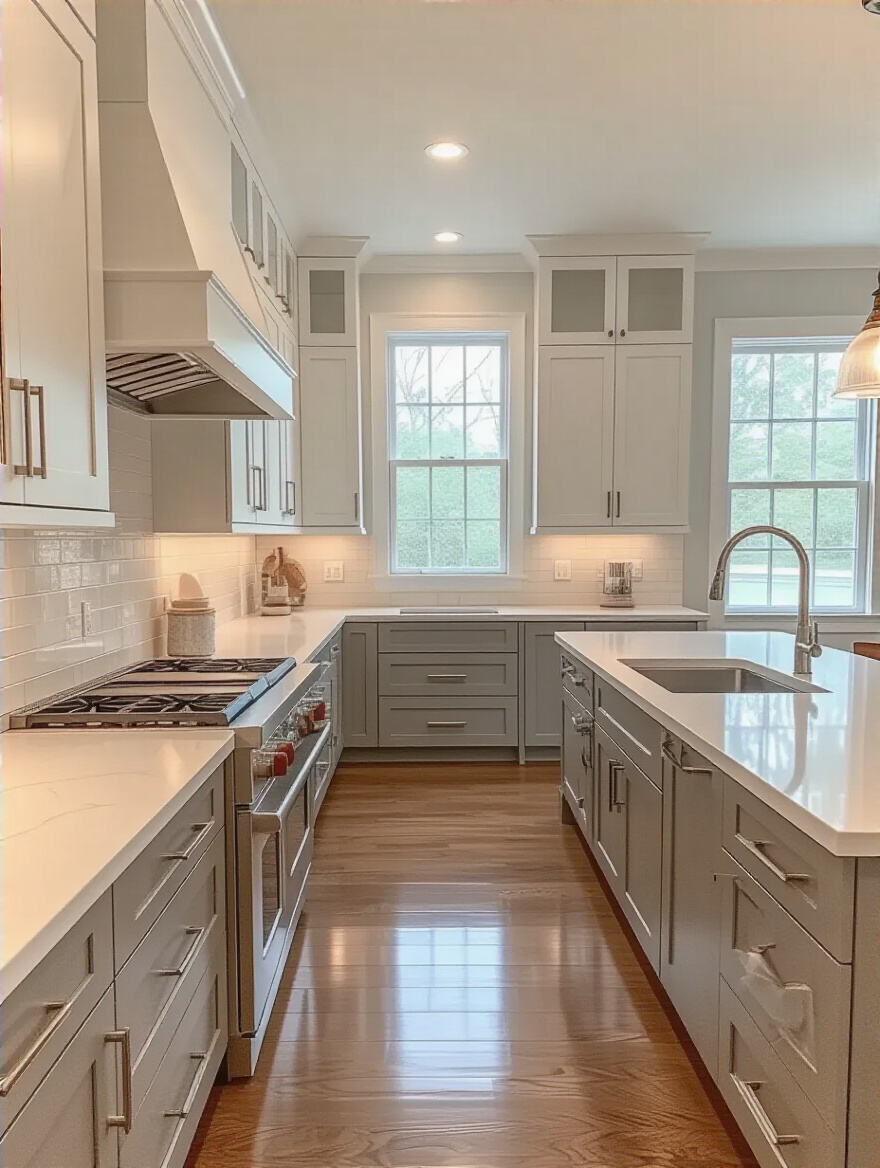
A full-wall backsplash, especially in a seamless material like a stone slab or large-format tile, creates an immersive, monolithic experience. It transforms an entire wall into a canvas, which can make a small kitchen feel grand and a large kitchen feel incredibly luxurious. A standard, counter-height backsplash, however, offers a different kind of beauty. It acts as a deliberate, refined accent, allowing the color and texture of the wall above to contribute to the room’s character. This approach is often more adaptable, letting you change the wall color for a simple refresh without touching the tile.
The next consideration, and perhaps one of the most transformative, is not a material at all, but the light that will grace it. How you illuminate your choice will determine whether its soul is revealed or remains hidden in shadow.
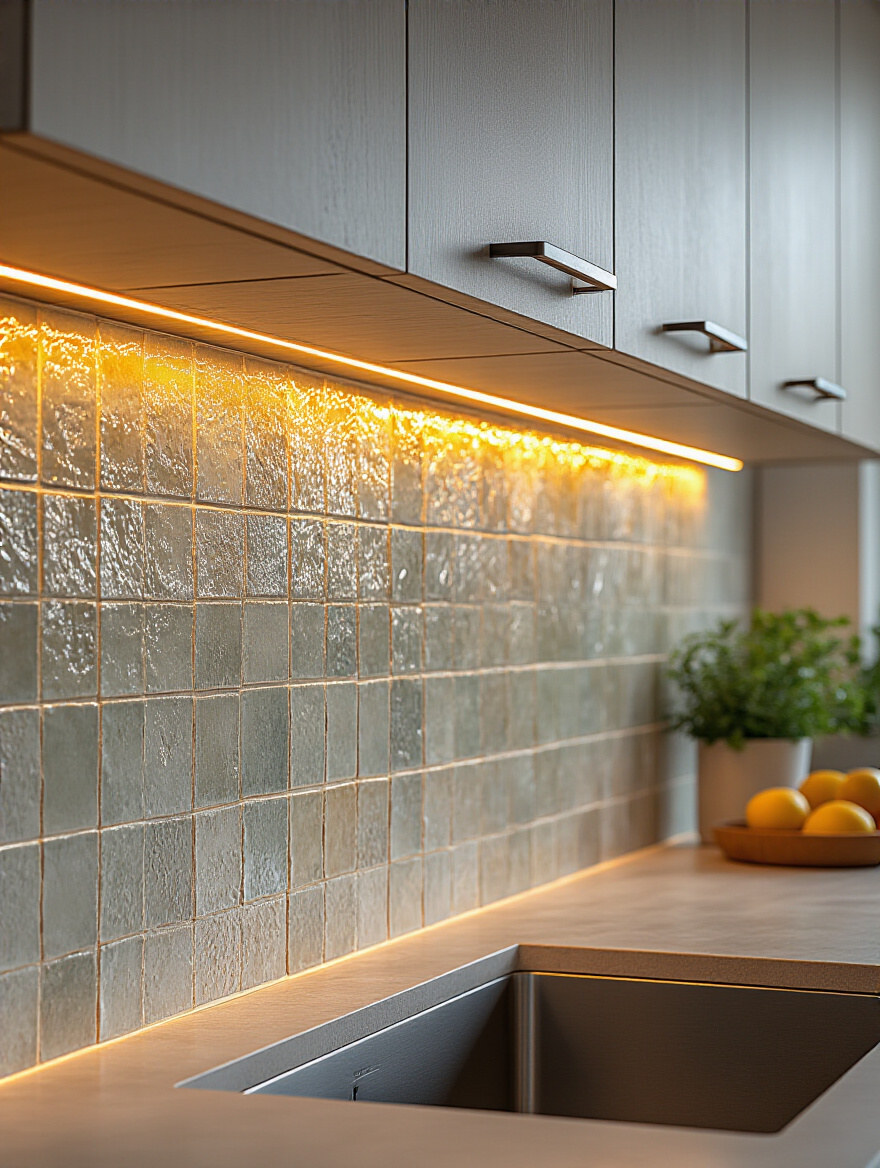
In Islamic architecture, light is a sacred element, used not just to illuminate but to transform. It reveals hidden patterns, creates depth, and breathes life into static forms. The same principle applies to your backsplash. Under-cabinet lighting is not merely functional; it is the key that unlocks the material’s deepest character.
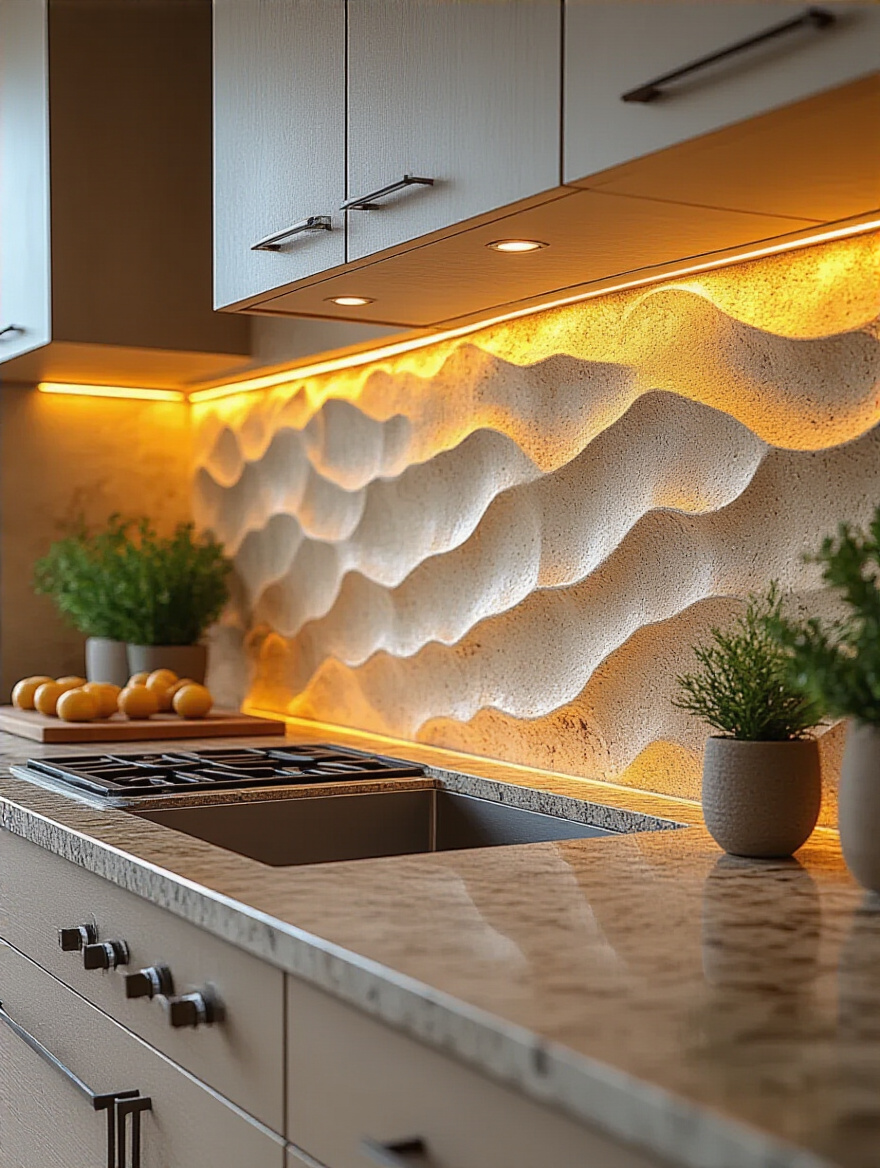
Without focused light, even the most exquisite tile can appear flat and lifeless. But with a warm, directed glow, the subtle undulations of a handmade tile come alive with soft shadows. The iridescent shimmer of a mother-of-pearl mosaic catches the light like a thousand tiny stars. The crystalline structure of a quartzite slab reveals its inner fire. Consider the light as another material you are working with—one that is fluid, dynamic, and essential.
As we move from these foundational principles of light and space, we must now turn our attention to the physical resilience of our chosen materials. Beauty must be prepared to endure the daily rituals of a living kitchen.
With a philosophical foundation in place, our journey now turns to the practical realities of the kitchen. Here, we must honor the purpose of the space—a place of fire, water, and nourishment. The choices we make must be not only beautiful but also resilient, able to withstand the rhythms of daily life with grace.
A kitchen backsplash is a quiet guardian. It stands sentinel against the splatter of hot oil, the steam from a boiling pot, and the splash of water from the sink. Its beauty must be matched by its strength, for its primary role is one of protection. Choosing a material that cannot fulfill this sacred duty is a disservice to both your home and your peace of mind.
Before you are captivated by a material’s appearance, inquire about its nature. Is it porous like certain natural stones, requiring a diligent seal to protect it from stains? Or is it non-porous, like glass or glazed porcelain, offering effortless resilience? Behind the range, where heat is most intense, consider materials like stainless steel or a solid slab of quartz that will not scorch or crack. Your choice should bring you comfort, not concern.
Once you have honored the functional needs of the space, you can begin to visualize its form. It is in the sketching, the planning of lines and intersections, that your vision starts to become a tangible reality.
Before a single tile is set, you must first author the design on paper. This is not a tedious task but an act of creation, a moment to translate the vision in your mind’s eye into a concrete plan. Sketching allows you to see how patterns will flow, where cuts will need to be made, and how the design will meet corners and outlets. It is here that you solve problems before they arise.

This simple act of drawing saved a client from a significant mistake. She had chosen a stunning, intricate waterjet mosaic to sit above her range, framed by simpler field tiles. In her sketch, we discovered the mosaic’s dimensions created awkward, sliver-thin cuts of the field tile on either side. By adjusting the scale of the mosaic on paper, we created a seamless, harmonious transition. Your sketch is your first draft, allowing you to refine the story your backsplash will tell, ensuring every line is placed with purpose.
This intentional planning ensures that your design is not just a collection of beautiful tiles, but a coherent, graceful composition. From this blueprint, we can confidently move to the selection of the physical materials that will bring it to life.
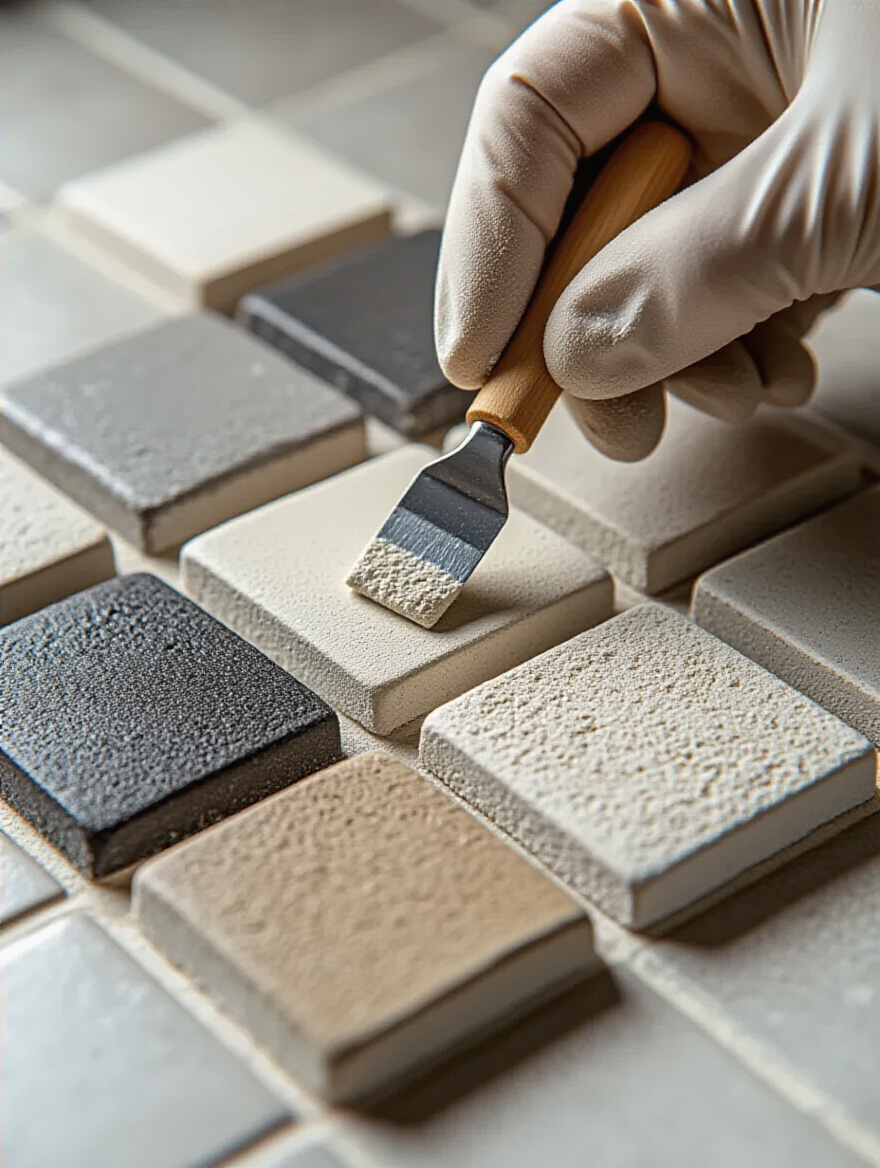
Now, we transition from the ethereal realm of ideas to the tactile world of materials. This is where the soul of your design takes physical form. Each choice—the tile, the slab, the grout that binds them—is a verse in the poem you are writing on your wall. It is a moment of deep connection, of choosing the elements that will create the sanctuary you envision.
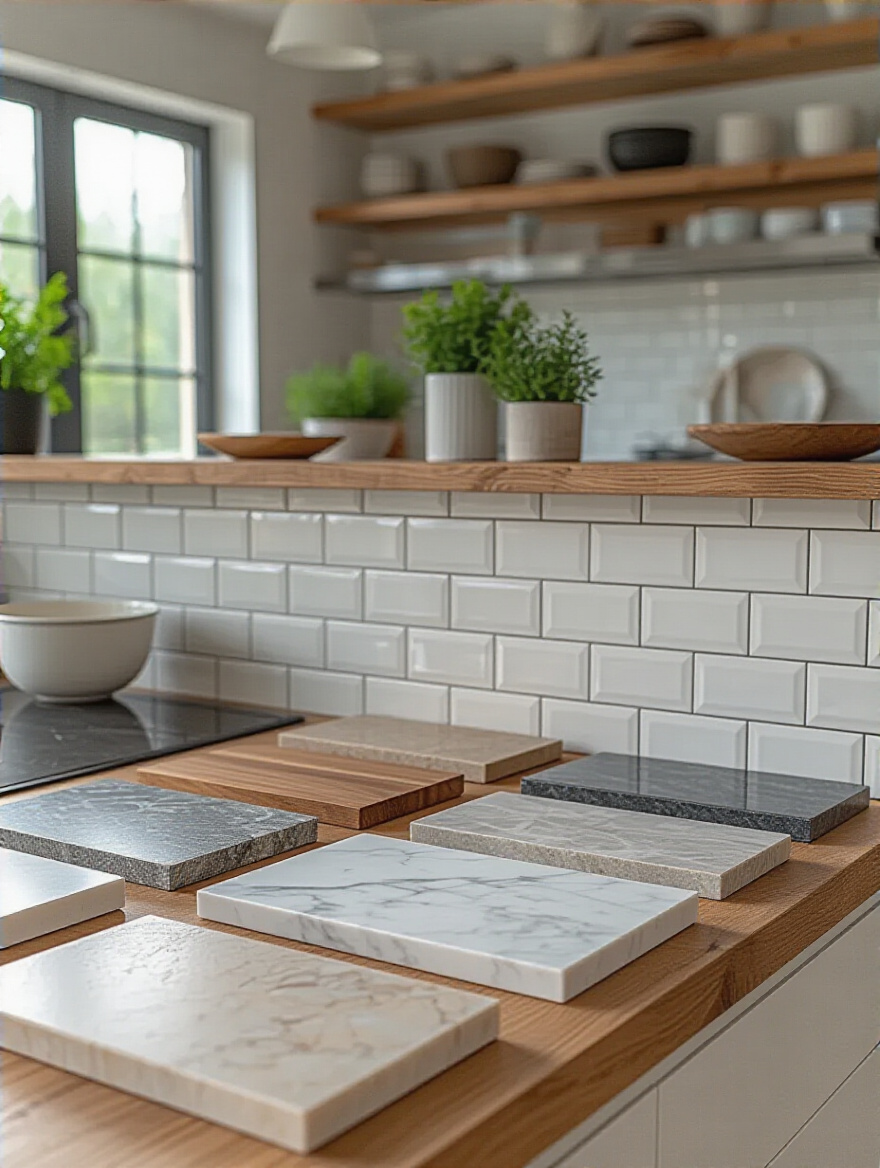
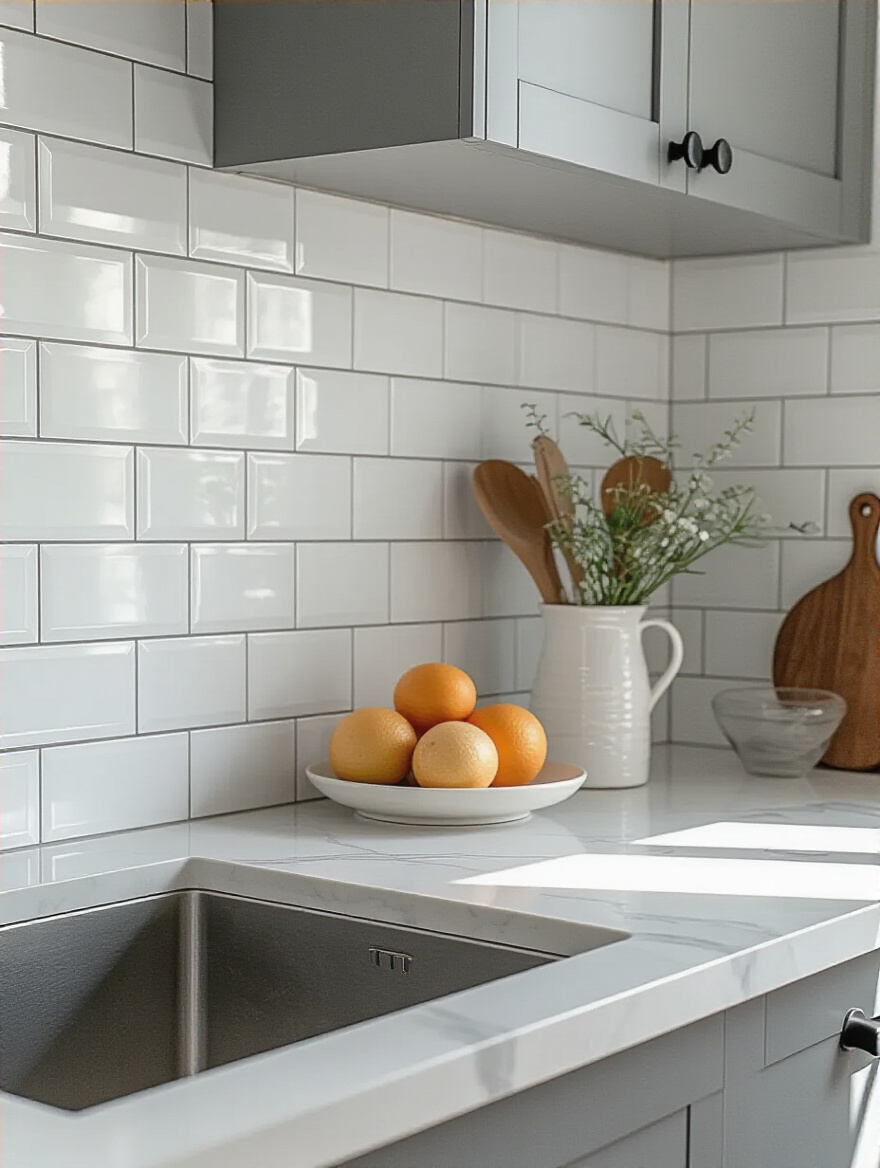
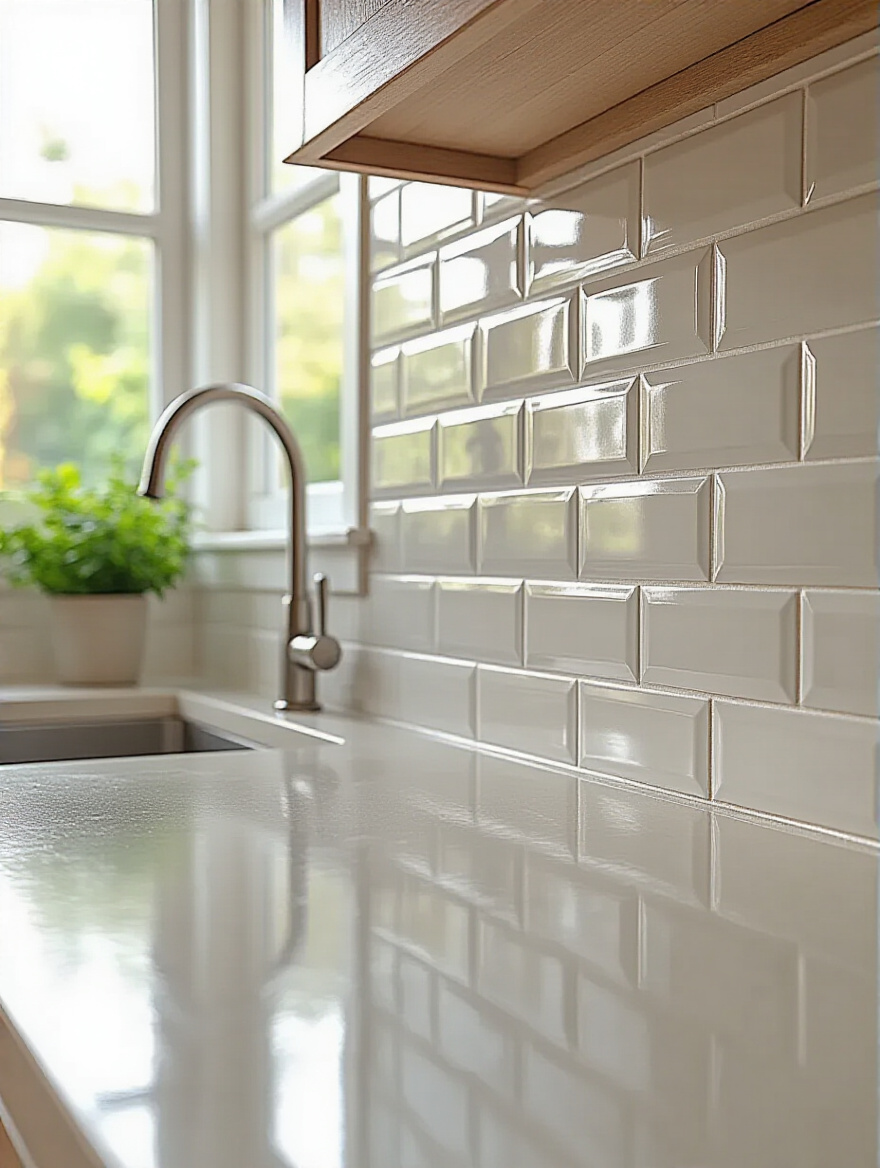
The material you choose is the primary voice of your backsplash. Will it speak in the quiet, uniform rhythm of ceramic tiles, the grand, sweeping statement of a single stone slab, or the intricate whispers of a mosaic? Each material carries its own energy, its own history. Ceramic and porcelain offer a universe of possibilities, from the humble subway tile to intricately patterned designs that echo ancient traditions of geometry and nature.
A single slab of marble or quartzite eliminates grout lines entirely, creating an uninterrupted flow of natural artistry—a meditation on the beauty of stone. And then there are creative alternatives, like sheets of burnished brass or back-painted glass, which offer a modern, reflective quality that can amplify light and space. Do not rush this decision. Gather samples. Live with them in your kitchen for a few days. See how they respond to the morning sun and the evening’s soft glow. Let the material choose you as much as you choose it.
Once the primary material has been chosen, we must consider the element that will hold it all together—a detail often overlooked, yet one that has the power to define the final aesthetic entirely.
Grout is the silent partner to your tile, yet its impact is profound. It is the defining line, the unifying thread that can either celebrate the shape of each individual tile or blend into a seamless whole. Many people see it as a purely functional choice, but it is one of the most powerful design tools at your disposal.
A grout that contrasts with your tile—like a dark charcoal grout with a white tile—creates a graphic, geometric statement. It celebrates the grid, the pattern, and the order of the design. Conversely, a grout that closely matches the color of your tile will soften the look, creating a more monolithic, textural surface where the overall form takes precedence over the individual pieces. Beyond color, consider its composition. An epoxy grout, while more of an investment, offers superior resistance to stains and moisture, a practical consideration that honors the long-term serenity of your space.
With the tile and its unifying grout selected, we must now turn our attention to the practicalities of preparation, ensuring that the canvas for our creation is sound and ready.
Before the first tile is set, there must be a ritual of preparation. Gathering your tools and materials is not just a logistical step; it is an act of intention. It is a way of honoring the craft and ensuring that the process of creation flows without interruption or frustration. Having everything you need at hand allows you to enter a state of focused calm.

I recall a weekend project of my own where a forgotten tool—a specific trowel—sent me on a frantic trip to the hardware store, breaking the peaceful rhythm of my work. The difference between a joyful, meditative installation and a stressful, chaotic one often lies in this simple act of preparation. Create a checklist. Lay out your tools, your adhesive, your spacers. Ensure your tiles are clean and accessible. This mindful gathering prepares both your space and your spirit for the work ahead.
This preparation culminates in the most critical step before installation: readying the wall itself. The most beautiful tile will fail if its foundation is not sound.
The wall behind your backsplash is the foundation of your entire design. It must be clean, smooth, and structurally sound. To apply beautiful tiles over a flawed surface is like building a house on sand; the result will inevitably be compromised. This preparatory step, while unseen, is perhaps the most crucial for ensuring the longevity and integrity of your work.

Take the time to thoroughly clean the wall, removing any trace of grease or dust that could interfere with adhesion. Fill any cracks or holes, sanding them smooth to create a perfect, level plane. In my work, I always apply a high-quality primer. This seals the surface and ensures the adhesive bonds powerfully and permanently. This is an act of respect for the materials and for the home itself, ensuring that your beautiful work will endure for decades.
Now that the foundation is pure and strong, we are ready to begin the physical act of creation, applying the mortar that will bind your vision to your home.
We now arrive at the heart of the craft, where intention meets action. This phase is a dance of precision and patience. The techniques used here are what elevate a simple installation to a work of art, ensuring not only its beauty but its enduring strength. This is where hands, heart, and mind work in unison.
The mortar, or thin-set, is the unseen heart of your backsplash. Its proper application is what creates an unbreakable bond between the tile and the wall, a bond of integrity that ensures your work will last a lifetime. This is not a step to be rushed. The goal is complete and even coverage, leaving no hollow voids behind the tile where weakness or moisture could accumulate.
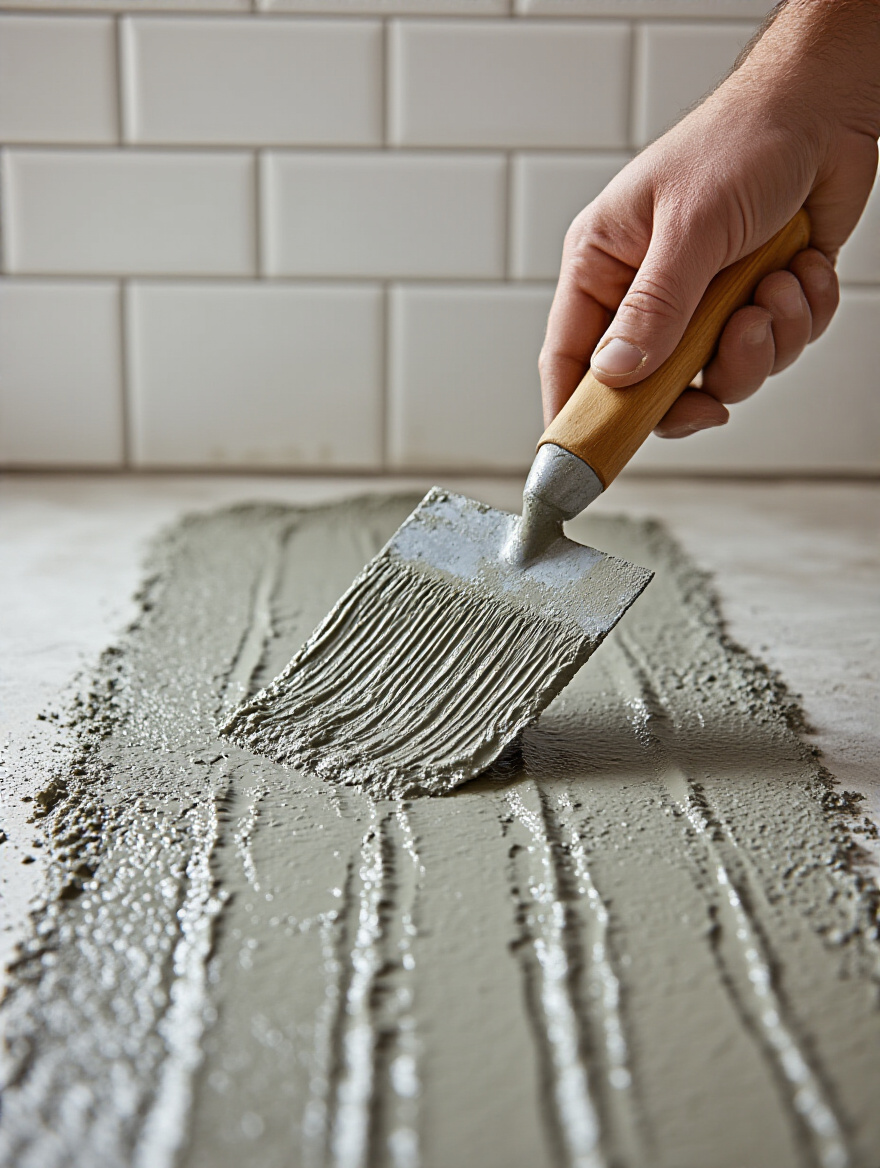
Hold your notched trowel at a consistent 45-degree angle, combing the mortar into straight, uniform ridges. This creates channels that collapse when the tile is pressed into place, ensuring full adhesion. For larger tiles, I always “back-butter” them—applying a thin skim coat of mortar to the back of the tile itself. It is a small, extra step that provides an unmistakable feeling of solidity and permanence. This meticulous approach ensures your backsplash is not merely attached to the wall, but becomes an integral part of it.
With a secure foundation established, our focus shifts to the visible art of the installation: the precise cutting and laying of each individual piece.
This is where geometry and artistry converge. The cutting and laying of tiles require a steady hand and a patient eye. Every cut must be precise, every grout line consistent, every tile perfectly level with its neighbors. It is this attention to detail that distinguishes a professional, heirloom-quality installation from an amateur one.
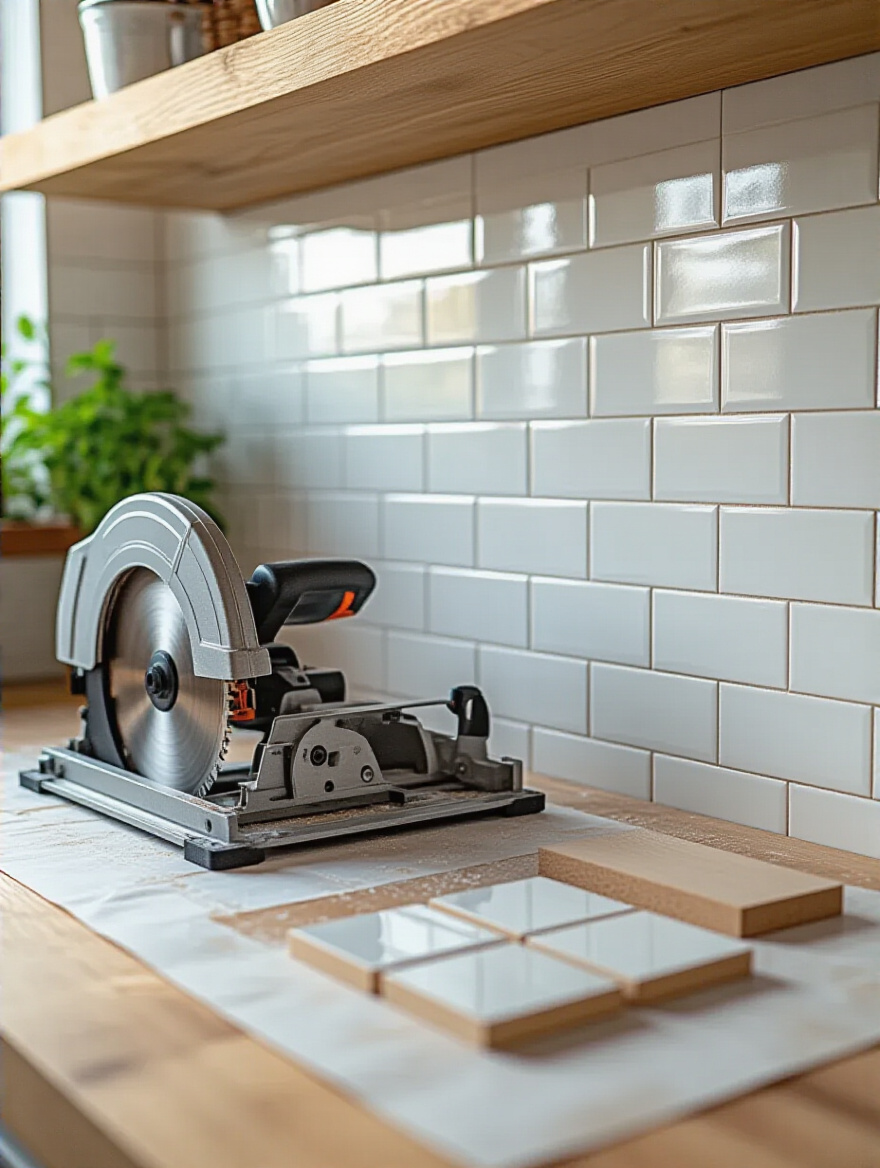
I always recommend a dry lay—arranging your tiles on a flat surface or against the wall with spacers before any mortar is applied. This allows you to perfect the layout, plan your cuts around outlets, and ensure the pattern flows seamlessly, especially around corners. When cutting, a wet saw is your greatest ally, producing clean, chip-free edges that a simple tile snapper cannot match. Take your time. Measure twice, cut once. Let the process be a meditation on precision.
This phase concludes the core installation. Now, we move into the final, enhancing touches that will truly make the backsplash sing, transforming it from a well-installed surface into a fully integrated piece of your home’s story.
With the structural work complete, we enter the final and most expressive phase of our journey. This is where we add layers of personality, light, and protection. It is the polishing of the gem, the final touches that transform a well-crafted backsplash into a soulful and functional work of art that feels deeply personal and alive.
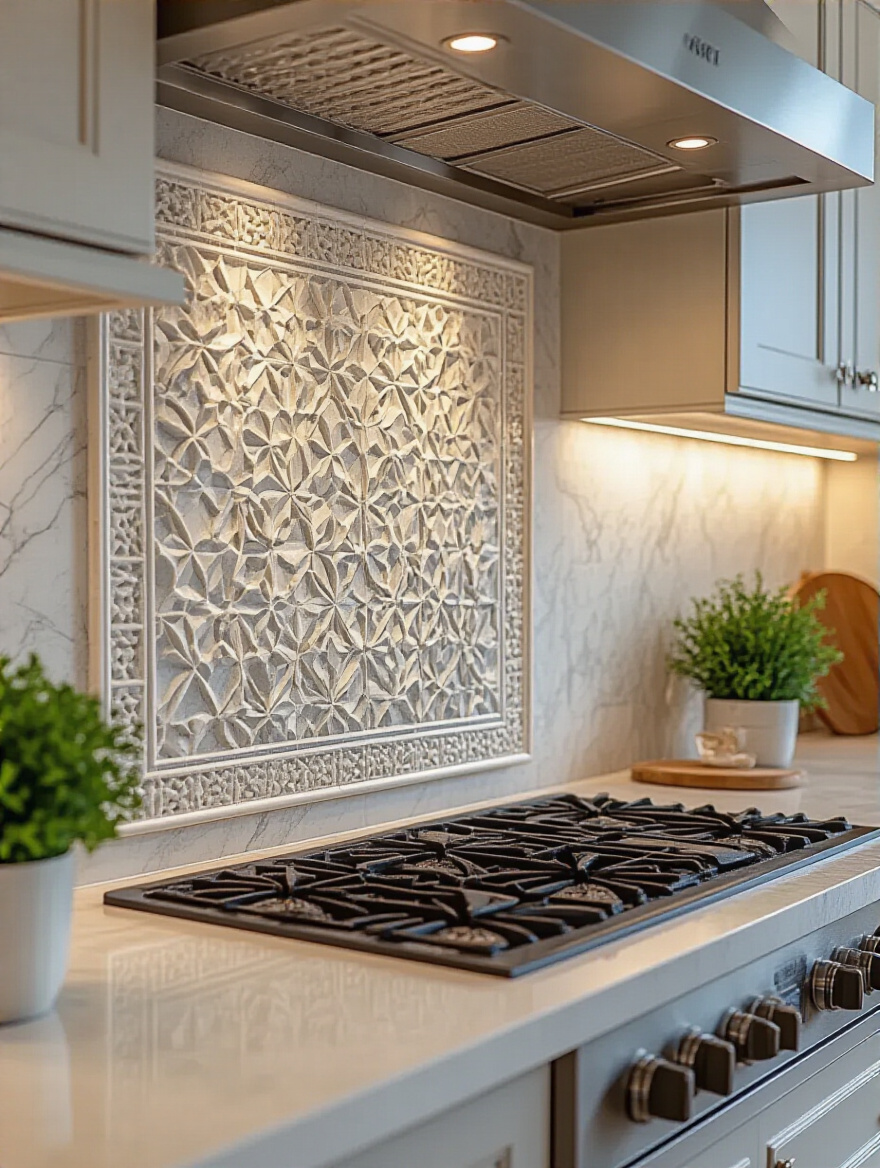
While there is a profound beauty in uniformity, a well-placed decorative accent can be the personal signature on your design. It is an opportunity to introduce an element of delightful surprise, a focal point that tells a story. This might be a panel of intricate mosaic, a single row of hand-painted tiles, or a subtle relief pattern that introduces texture and shadow.
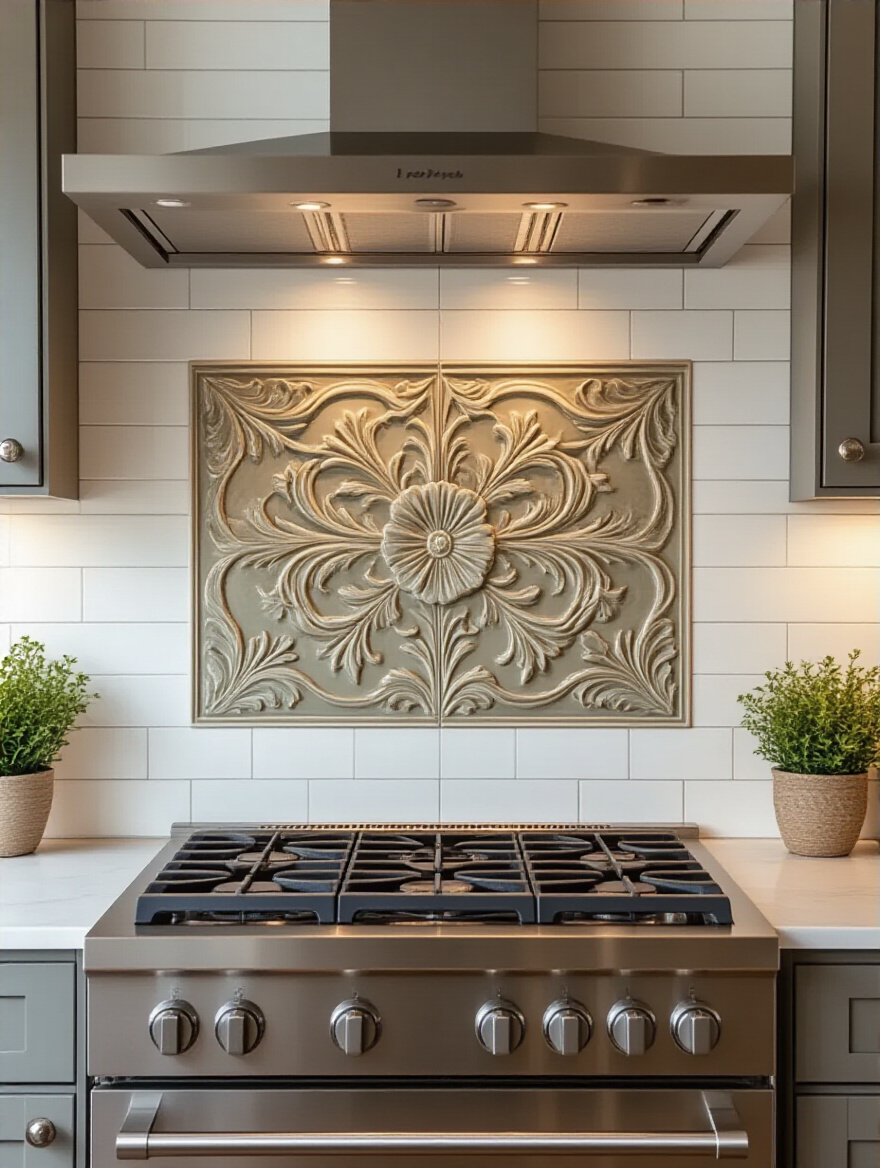
Think of this accent as a piece of jewelry for your kitchen. Placed thoughtfully behind the range or sink, it draws the eye and creates a sense of occasion. I worked with a family who wanted to honor their heritage, and we incorporated a single row of tiles featuring a classic eight-pointed star motif. It was a subtle, meaningful detail that transformed their simple backsplash into a personal testament to their identity, infusing the entire space with a deeper layer of meaning.
The power of such an accent is magnified when it is properly illuminated, which brings us to the crucial role of lighting in revealing the full beauty of your creation.
As we discussed earlier, light is a transformative element. Now that your backsplash is installed, you can fine-tune your under-cabinet lighting to showcase its best features. This is akin to lighting a sculpture in a gallery. The angle, color temperature, and intensity of the light can dramatically alter the mood and highlight different aspects of your chosen material.
For a backsplash with a lot of texture, like split-face stone or handmade Zellige tile, positioning the light to “graze” the surface at a slight angle will create beautiful highlights and shadows, emphasizing its three-dimensional quality. For a glossy or iridescent surface, a more diffused light will prevent harsh glare while still allowing it to shimmer. Using a dimmer switch is essential; it allows you to shift the ambiance from bright, functional task lighting to a soft, warm glow for quiet evenings.
With the beauty of your backsplash fully revealed by light, our next step is to ensure its practical preservation for the years to come.
Grout, being porous, is vulnerable to the daily life of a kitchen. Sealing it is an act of preservation, a crucial final step to protect your beautiful work from stains and moisture. Think of it as an invisible shield that safeguards the integrity of both your grout and the wall behind it, ensuring your backsplash remains as pristine as the day it was installed.

Applying a high-quality penetrating sealer is a simple process, but its effects are long-lasting. It prevents splatters of sauce or wine from permanently staining the grout lines and makes cleaning significantly easier. This small act of care, repeated every year or two, is a commitment to the longevity of your design. It ensures that the sanctuary you have created remains pure and untarnished.
The final touches in this section involve integrating the necessary, modern intrusions of daily life—like electrical outlets—so seamlessly that they almost disappear.
Nothing disrupts the serene flow of a beautiful backsplash like a clumsy, standard electrical outlet. Integrating these necessities with grace and discretion is a hallmark of thoughtful, high-end design. The goal is to make them disappear, preserving the uninterrupted beauty of your chosen material.
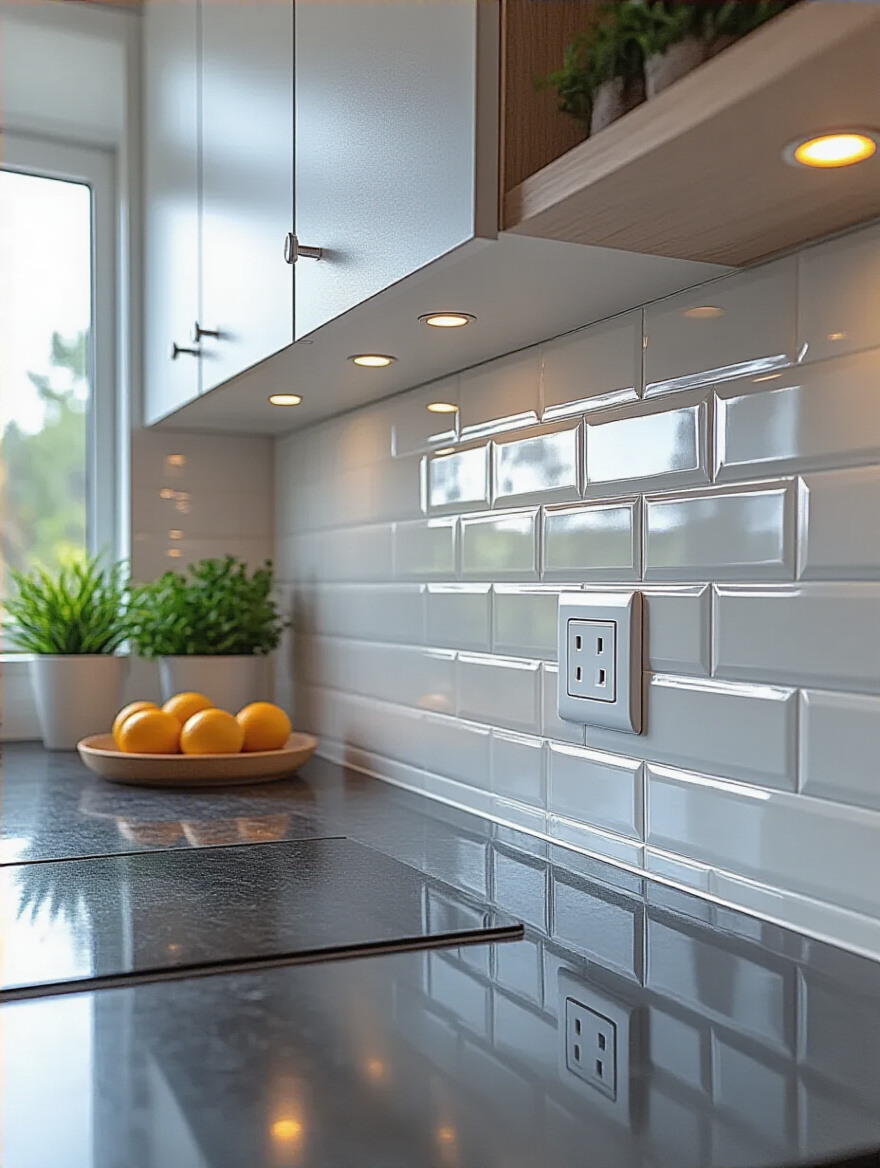
There are wonderfully elegant solutions available today. Under-cabinet power strips hide outlets completely from view, freeing your backsplash to be a pure, continuous surface. Pop-up outlets that retract into the countertop offer power only when needed. If outlets must be on the wall, consider flush-mount options and color-matched faceplates that blend seamlessly with your tile or stone. Planning these placements before installation is key, allowing for precise cuts that feel intentional and integrated, rather than like an afterthought.
Now, let us turn our attention to the final layer of harmony: the crucial relationship between your newly created backsplash and its most prominent partner in the kitchen, the countertop.
Our final steps on this design journey involve mastering the art of synthesis and illusion. Here, we ensure that your new backsplash not only stands beautifully on its own but also engages in a harmonious dialogue with its surroundings. We will also explore how the very direction of the pattern can reshape the perception of your entire kitchen.
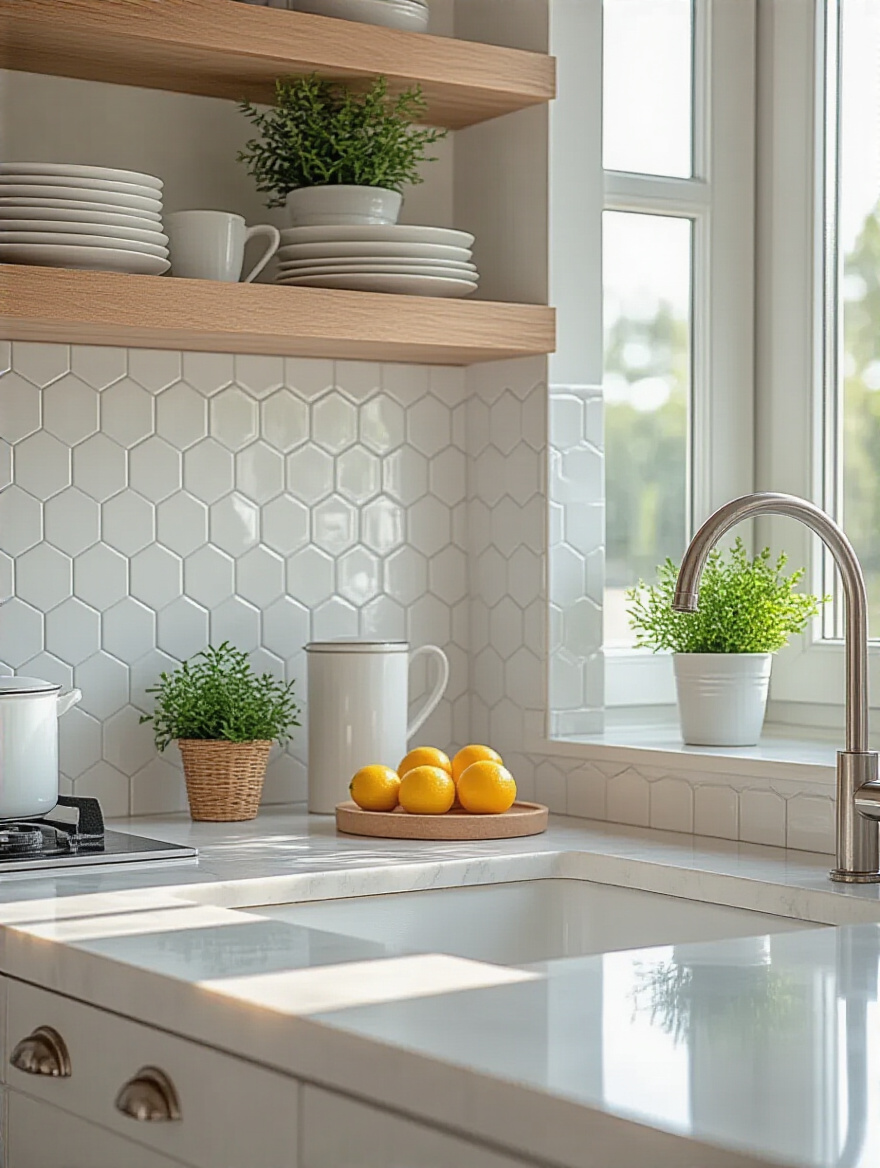
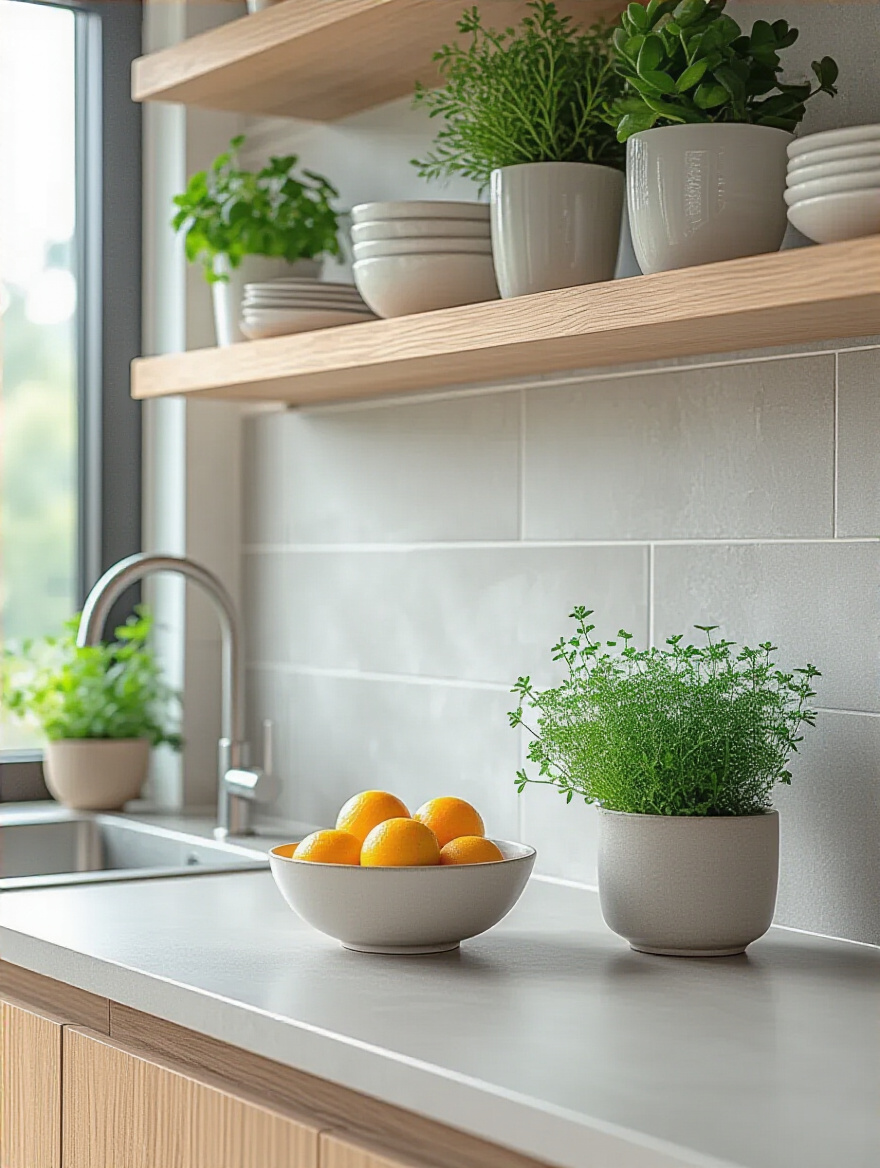
Your backsplash and countertop are the two most prominent surfaces in your kitchen. They must exist in a state of harmonious dialogue. If one is bold and full of pattern and movement, the other should be its quiet, supportive partner. If both try to shout at once, the result is visual chaos, not serenity. This pairing is the foundation of your kitchen’s entire aesthetic.
If your countertop is a dramatically veined marble or a vibrant granite, choose a backsplash in a solid, calming tone pulled from a subtle color within the stone. This allows the countertop to remain the star, with the backsplash as its elegant, supporting cast. Conversely, if you have a quiet, solid-colored quartz countertop, you have the freedom to be more expressive with your backsplash, perhaps with a classic herringbone pattern or a beautifully glazed handmade tile. The key is balance. Always test samples together in your kitchen’s light before making a final decision.
Once this crucial pairing is decided, we can use the pattern itself to influence the feeling of the space, a subtle but powerful tool of design.
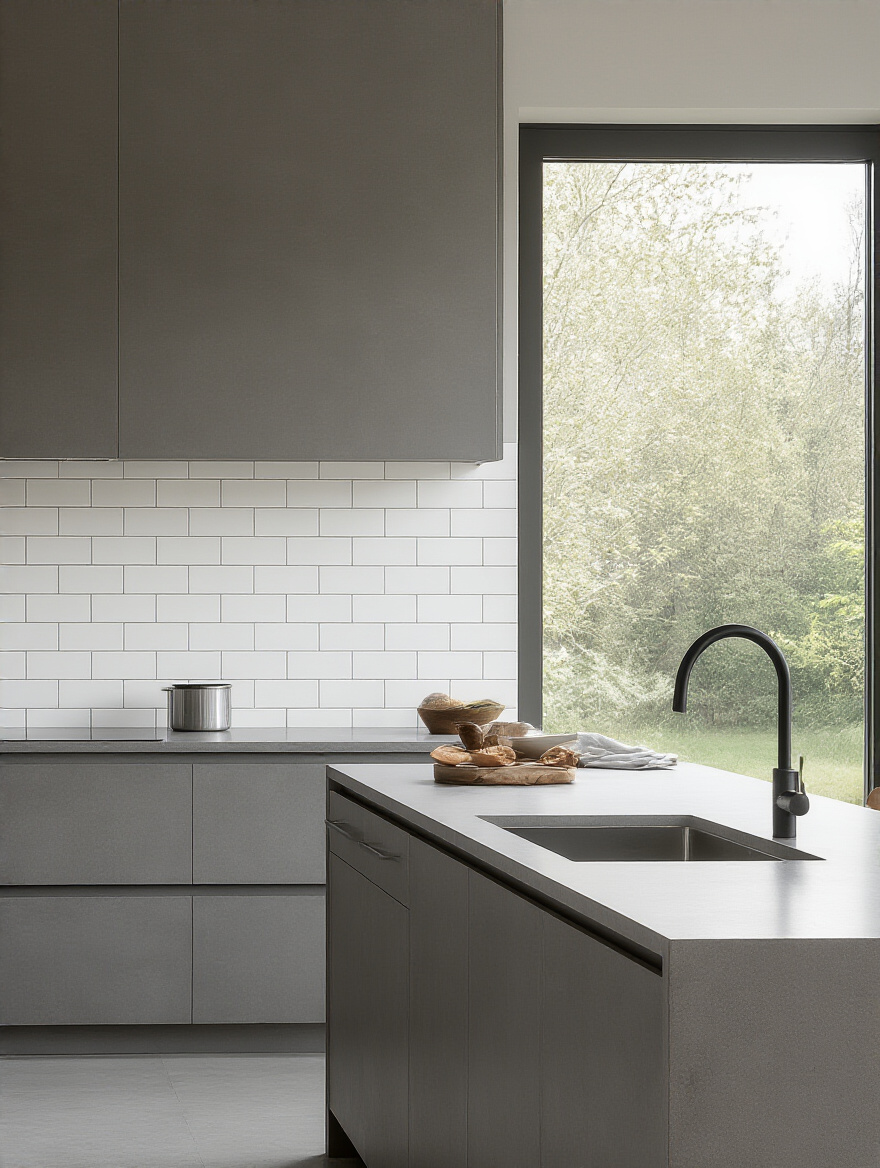
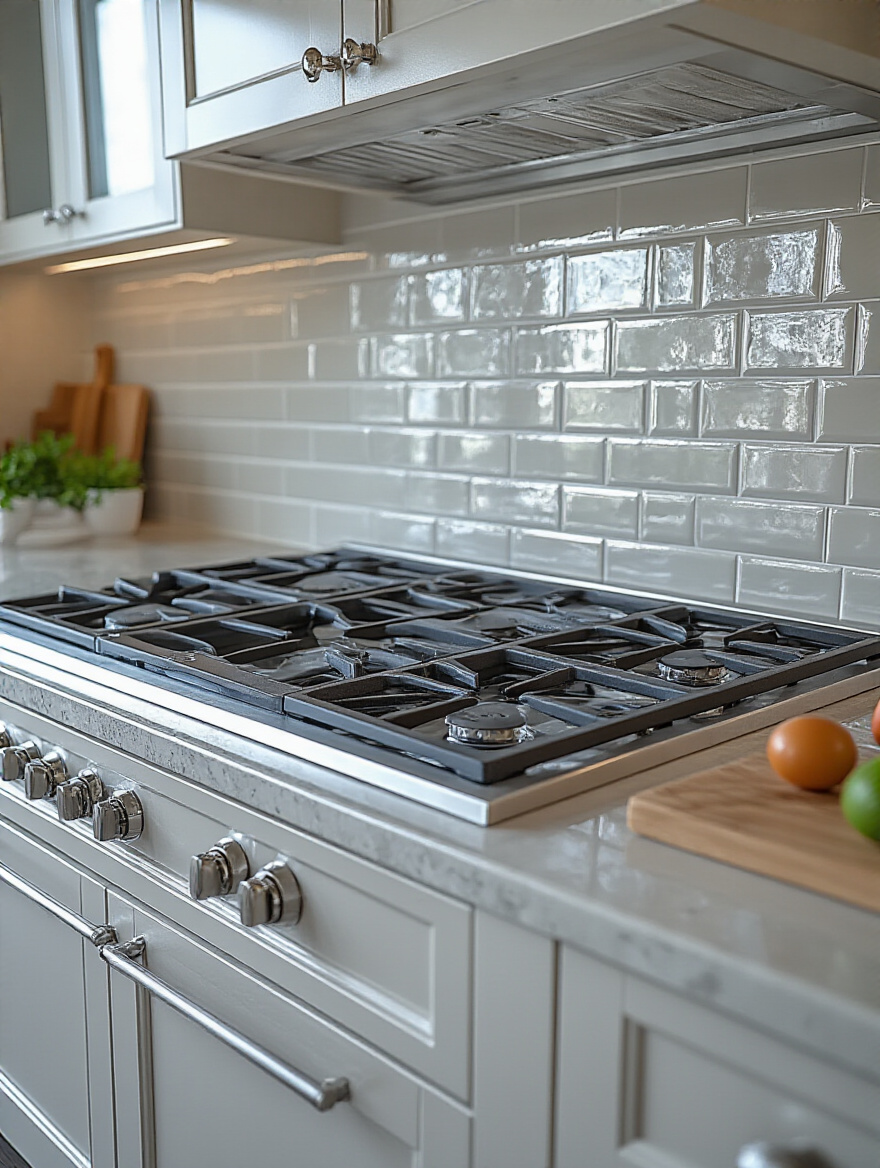
The direction in which you lay your tiles is not merely an aesthetic choice; it is a tool for manipulating the perception of space. A rectangular tile, for example, tells a very different story when laid horizontally, vertically, or in a herringbone pattern. This is a subtle art that can make your kitchen feel wider, taller, or more dynamic.
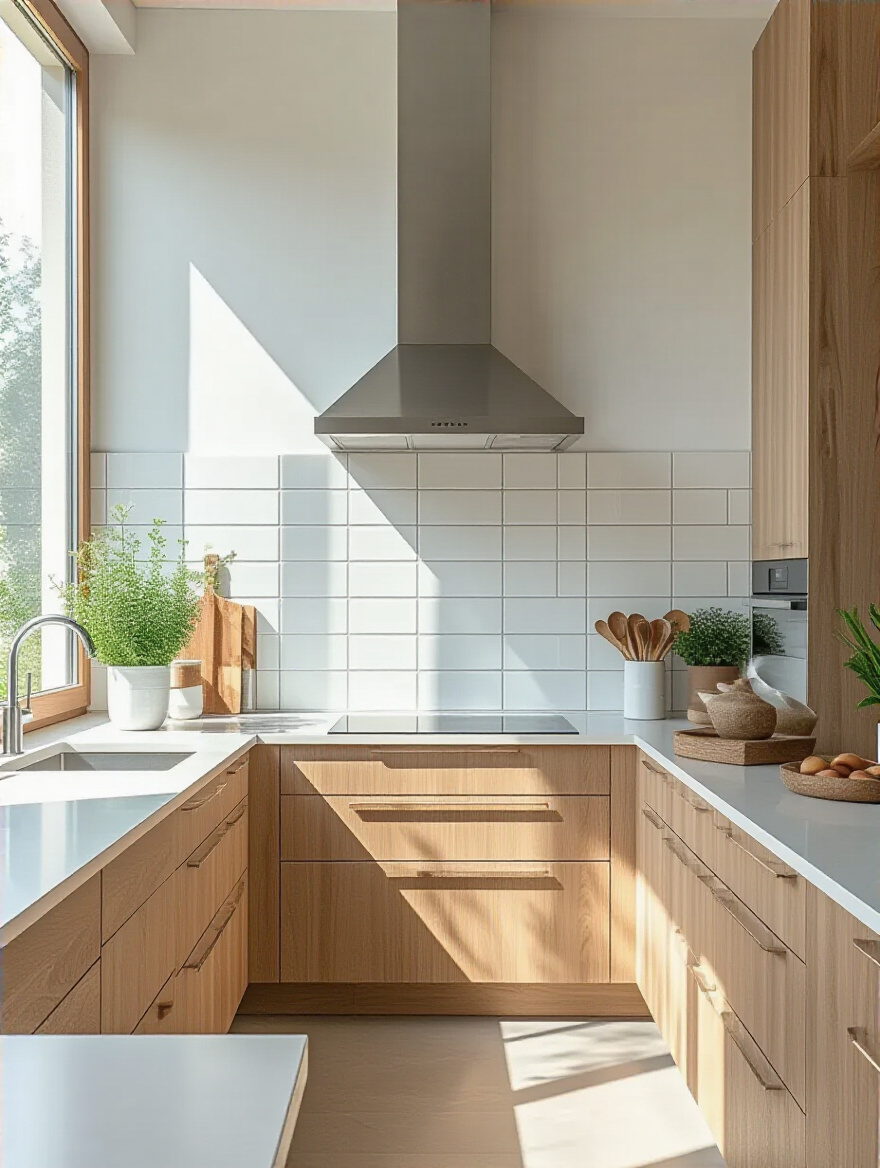
Laying tiles horizontally in a classic brick-like pattern will emphasize the width of a room, making a narrow kitchen feel more expansive. Stacking those same tiles vertically, in clean columns, will draw the eye upward, creating a sense of height and loftiness—a wonderful solution for a kitchen with lower ceilings. A herringbone or chevron pattern introduces a sense of movement and sophisticated energy, transforming a simple tile into a dynamic focal point. Consider what your space needs most, and let the direction of your pattern guide the eye and shape the feeling of the room.
We are now approaching the end of our journey. It is time to reflect on the wisdom gained and the pitfalls to avoid, ensuring the lasting success of your creation.
As we refine our vision, we must embrace a long-term perspective. A truly successful design is not just beautiful on the day of completion but continues to bring peace and joy for years to come. This requires us to think about maintenance, repair, and the timeless quality of our choices, ensuring our sanctuary is built to last.
Your backsplash, like any element of beauty in your home, requires a gentle ritual of care to maintain its brilliance. Establishing a simple, regular cleaning routine is an act of stewardship that preserves its integrity and hygienic function. A quick wipe-down with a soft cloth after cooking prevents the buildup of grease and splatters that can become stubborn over time.
Be mindful of the materials you use. Harsh, acidic cleaners can damage natural stone or delicate glazes. A simple, pH-neutral cleaner is often all that is needed. This regular, gentle care is far more effective and less damaging than infrequent, aggressive scrubbing. It is a small act of devotion that ensures your backsplash remains a source of pride and serenity.
But even with the best care, the passage of time can leave its mark, particularly on the vulnerable grout lines that hold our design together.
Grout is the framework of your backsplash, but it is also its most vulnerable component. Over time, it can become discolored, cracked, or crumbled, detracting from the overall beauty of your installation. Addressing grout issues promptly is essential for maintaining both the appearance and the protective function of your backsplash.
For minor discoloration, a deep cleaning or a grout colorant can work wonders, instantly refreshing the entire look. For areas where grout is cracking or missing, it must be carefully removed and replaced to prevent moisture from seeping behind the tiles. This is a meticulous but highly rewarding task that can make an old backsplash look brand new, restoring its crisp, clean lines and hygienic seal.
Sometimes, however, a more significant refresh is desired without the disruption of a full replacement. In these cases, there are creative solutions to explore.
If your existing backsplash is structurally sound but aesthetically dated, there are ways to rejuvenate it without resorting to demolition. Painting tiles or applying high-quality adhesive coverings offers a remarkable transformation with minimal cost and disruption. This is a wonderful option for those seeking a significant change on a modest budget or for those in rental homes.
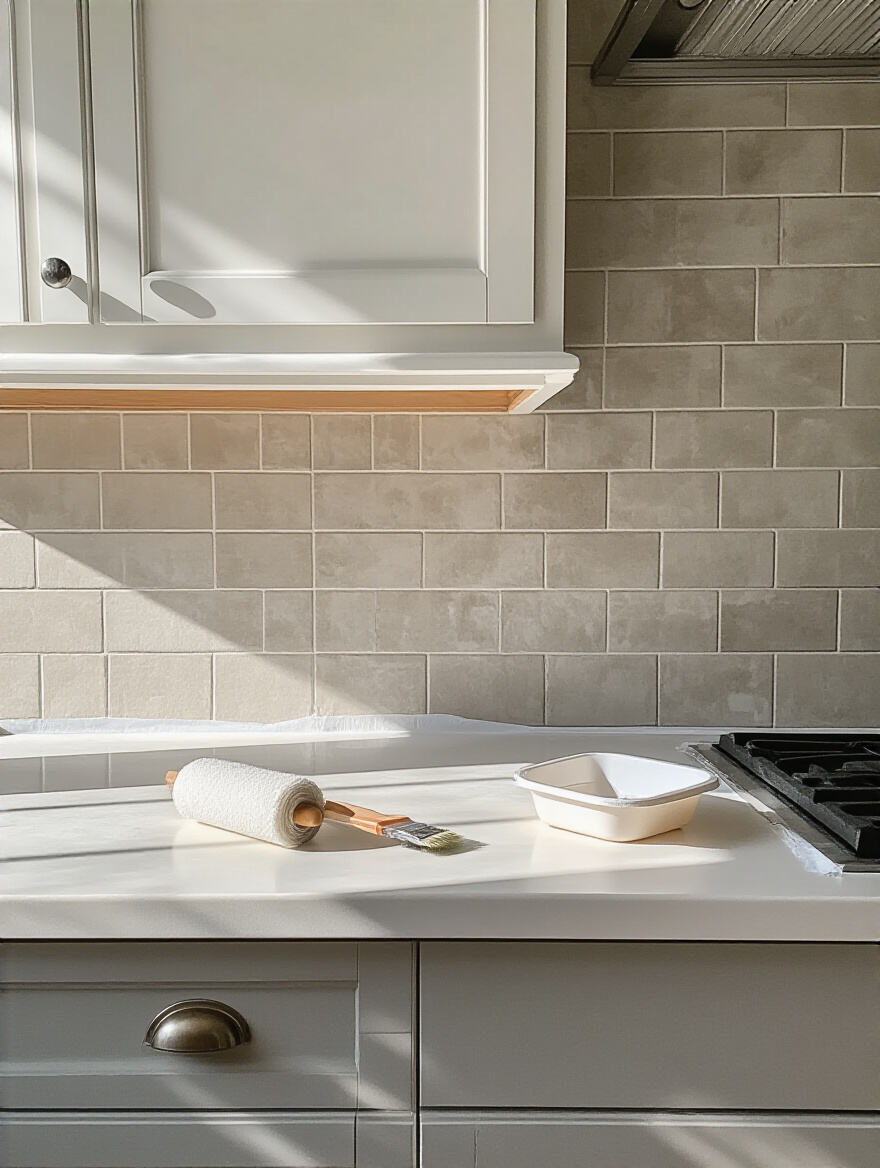
The key to success in painting tiles lies in meticulous preparation: thorough cleaning, degreasing, and the use of a high-adhesion primer are non-negotiable. Modern epoxy-based tile paints are incredibly durable and can completely change the character of a room. Alternatively, architectural-grade peel-and-stick tiles or vinyl films have evolved dramatically in quality and realism, offering a convincing and completely reversible update.
These options for rejuvenation remind us that our homes can evolve with us. This brings us to the final, and perhaps most profound, consideration: designing for the future.
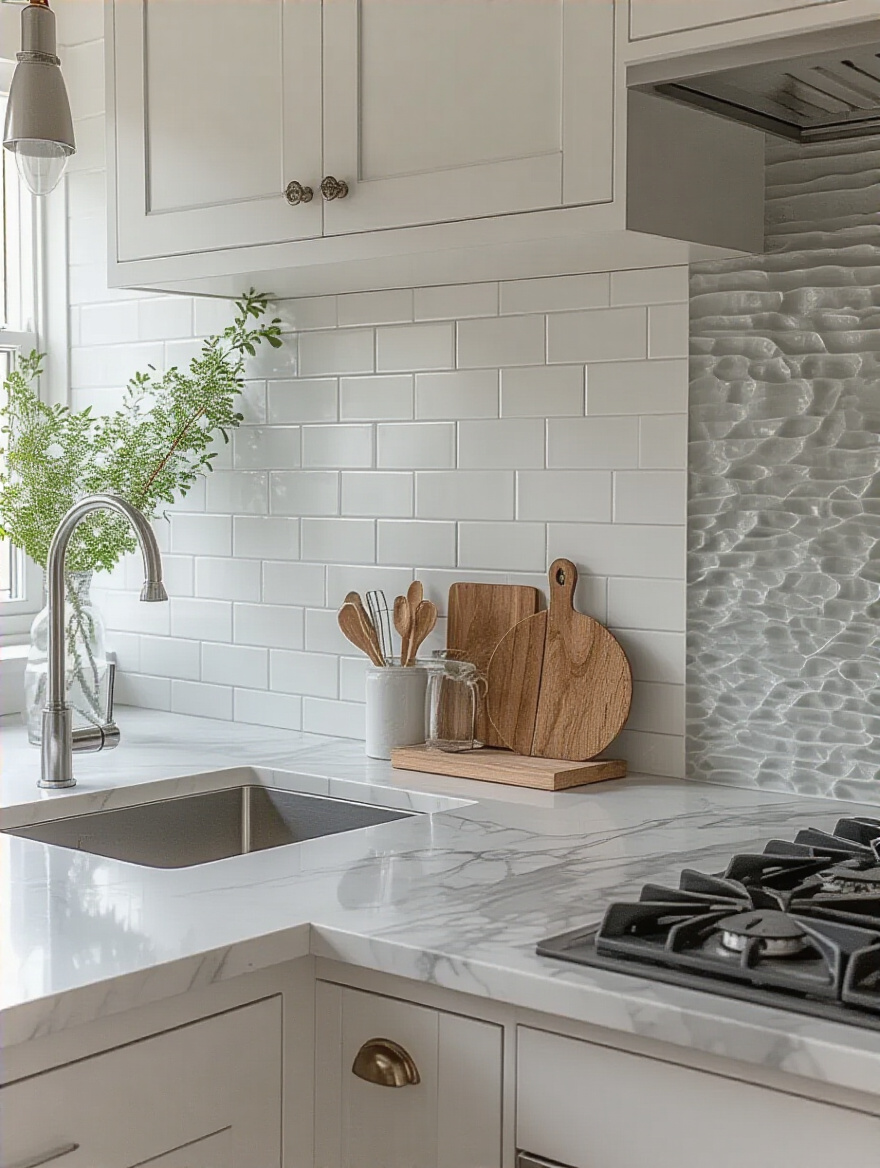
In a world of fleeting trends, the greatest challenge—and the greatest reward—is to create something timeless. When designing your backsplash, I encourage you to look beyond what is fashionable at this moment and choose materials, patterns, and colors that possess an enduring, classic beauty.
Simple, elegant forms like a classic subway tile, the natural artistry of marble, or a subtle, neutral-toned ceramic will remain graceful for decades. They create a serene, versatile canvas that can adapt to changing cabinet colors, new countertops, or different decor styles. By choosing a timeless design, you are making an investment in the long-term peace and harmony of your home, ensuring your backsplash will never feel like a mistake but rather a cherished, foundational element that evolves with you.
As our journey nears its end, we consider the human element of craftsmanship and the wisdom of knowing when to seek the guidance of a skilled artisan.
We conclude our exploration with a look at the wisdom of collaboration and the humility of learning from the mistakes of others. Acknowledging the complexity of certain designs and seeking expert help is a sign of strength, not weakness. Likewise, understanding common pitfalls allows us to navigate our own projects with greater confidence and foresight.
While the satisfaction of a DIY project is immense, there is a wisdom in knowing when to entrust your vision to the hands of a skilled professional. For intricate patterns like a mosaic or herringbone, or for challenging materials like natural stone slabs or delicate glass, the expertise of a master installer is invaluable. Their precision, knowledge, and specialized tools ensure an outcome of unparalleled quality.
A professional’s experience goes beyond mere installation. They understand how to properly prepare a wall for heavy stone, how to achieve perfectly consistent grout lines in a complex mosaic, and how to make immaculate cuts that a DIYer can rarely replicate. Investing in professional installation for a complex design is not an extra cost; it is an insurance policy on your investment and a guarantee of a truly breathtaking result that honors both the material and the design.
Finally, let us learn from the missteps of others, for their experiences can illuminate our path and guide us toward a more successful outcome.
In our journey, we have touched upon many common mistakes, but it is wise to gather them here as a final guidepost. The first is overwhelm; avoid this by grounding your choices in a cohesive vision for the whole kitchen, not just the backsplash. The second is misalignment; avert this with meticulous measurement, dry layouts, and the use of a laser level for a flawless grid. The third, and perhaps most insidious, is neglect.
Post-installation neglect—failing to seal your grout or to establish a gentle cleaning routine—can silently undermine the most beautiful work. I also urge you to embrace the wisdom of “overage.” Always purchase 10-15% more tile than you need. This accounts for cuts and mistakes and, most importantly, provides you with perfectly matched tiles for any future repairs. Avoiding these common pitfalls is the final step in ensuring your backsplash is a source of joy, not regret.
We have journeyed together from the quiet realm of intention to the tactile world of material and craft. You now see that a kitchen backsplash is so much more than a functional surface; it is a canvas for self-expression, a reflection of your values, and a cornerstone in the creation of a home that nurtures the soul. The right backsplash does not just complete a kitchen; it elevates it into a sanctuary.
Armed with these principles, you are no longer just choosing tile; you are authoring a space. You understand the dialogue between light and texture, the balance of pattern and plane, and the importance of a foundation built on care and intention. Your perfect kitchen is not a distant dream from a magazine page; it is a space waiting to be realized through your own thoughtful choices. May these ideas serve as your guide as you embark on the beautiful work of creating a home you truly adore.